This post contains affiliate links.
Is your pump acting up again, leaving you in a watery mess? Don’t panic! With our easy home DIY pump repairs guide, you’ll learn how to fix common pump issues and keep your water management system running smoothly. Say goodbye to costly repairs and hello to confidence in tackling pump problems yourself.
Key Takeaways:
- Gain the knowledge and skills to troubleshoot and repair common pump problems at home.
- Learn how to identify and fix power supply issues that may be affecting your pump.
- Discover step-by-step troubleshooting techniques to pinpoint the cause of pump malfunctions.
- Find out how to clean and maintain your pump to avoid clogs and other common issues.
- Understand when it’s time to call in the professionals for pump repairs and servicing.
Understanding the Role of Sump Pumps in Home Water Management
Sump pumps play a crucial role in protecting your home from basement flooding and water damage. These powerful devices are designed to pump accumulated groundwater out of your basement and away from your home, preventing water from seeping into the foundation and causing structural problems.
When heavy rain or melting snow causes water to collect in the sump pit, the sump pump is activated and begins pumping the water out of the pit and away from your home. This not only prevents potential flooding but also helps maintain a dry and stable basement.
Home water management is essential for maintaining a healthy and safe living environment. Excess moisture can lead to mold growth, damage to belongings, and structural issues. Sump pumps provide an effective solution to manage water levels and protect your home from these potential hazards.
By understanding the basics of sump pump operation and its role in home water management, you can better identify any issues and perform DIY repairs when necessary. In the following sections, we’ll explore common sump pump problems, troubleshooting steps, and maintenance tips to help you keep your sump pump in optimal condition.
Identifying Common Sump Pump Problems and Simple Fixes
Sump pumps are essential for preventing basement flooding and maintaining a dry and safe environment in your home. However, they can encounter various issues that hinder their performance. In this section, we will discuss some of the most common sump pump problems and provide you with simple DIY fixes to resolve them.
1. Pump not turning on:
If your sump pump fails to turn on, there are a few possible causes:
- The pump is not receiving power. Check the power cord and make sure it is securely plugged in.
- The float switch is stuck. Inspect the float switch for any debris or obstructions and clear them if necessary.
- The pump’s motor may be malfunctioning. In this case, it may require professional repair or replacement.
If your sump pump is making unusual noises, it could indicate a problem:
- Loud grinding or rattling noises may indicate a damaged impeller. Inspect the impeller for any signs of wear or damage and replace if necessary.
- Gurgling or bubbling sounds may indicate a clogged discharge line. Check the discharge line for any obstructions and clear them if needed.
- If the noise persists or you’re unsure of the cause, it’s best to consult a professional for further assessment.
3. Pump running continuously:
A sump pump that runs continuously can be a sign of underlying issues:
- The float switch could be stuck in the “on” position. Check the float switch and ensure it moves freely. Clean or replace the switch if necessary.
- A high water table or excessive groundwater infiltration may cause the pump to run continuously. Consider installing a backup sump pump or consult a professional to assess the situation.
- A malfunctioning check valve can also contribute to continuous pump operation. Inspect the check valve and replace if it is damaged or worn out.
By being aware of these common sump pump problems and their simple fixes, you can effectively troubleshoot and resolve issues on your own. However, if you’re uncertain or the problem persists, it’s always recommended to seek the assistance of a professional for further evaluation and assistance.
Home DIY Pump Repairs: Power Supply Issues and Solutions
Power supply problems can cause your pump to malfunction. In this section, we’ll cover two common power supply issues: checking breakers and GFCI outlets, and ensuring the proper circuit for your sump pump. We’ll guide you through the steps to troubleshoot these power supply issues and provide solutions to resolve them.
Checking Breakers and GFCI Outlets
Sometimes, a tripped breaker or a faulty GFCI outlet can cause your sump pump to stop working. To start, visually inspect the breakers in your electrical panel to see if any are in the “off” position. If you notice a tripped breaker, simply switch it back on. However, if the breaker trips again, it may indicate a more serious electrical issue and professional assistance should be sought.
Next, you’ll want to test the GFCI outlets. GFCI outlets are designed to protect against electric shock and are common in areas prone to moisture, such as basements. To test the GFCI outlet, press the “test” button, which should trip the outlet. Then, press the “reset” button to restore power. If the GFCI outlet does not trip or reset, it may need to be replaced.
Ensuring Proper Circuit for Your Sump Pump
It’s important to ensure that your sump pump is on the proper circuit to avoid power supply issues. To determine the circuit your pump is on, locate the electrical panel and identify the breaker that controls the sump pump. The breaker should be labeled accordingly or consult the owner’s manual or contact a professional electrician for assistance if it’s not labeled.
Once you have identified the circuit, ensure that it’s dedicated solely to the sump pump. This means it should not be shared with other electrical appliances or outlets. Sharing the circuit can overload it, leading to power supply problems. If other devices or outlets are connected to the same circuit, it’s recommended to consult a professional electrician to have a dedicated circuit installed for your sump pump.
Step-by-Step Troubleshooting Pump Repairs for Homeowners
Troubleshooting pump repairs can be done by homeowners with some basic knowledge and tools. In this section, we’ll provide a step-by-step guide to help you troubleshoot and identify the cause of pump problems. From checking the float switch to inspecting the impeller, you’ll learn the necessary steps to diagnose and address pump issues effectively.
When you encounter a pump problem, it’s important to approach the troubleshooting process systematically. By following a structured approach, you can narrow down the potential causes and find the appropriate solutions.
Here are the key steps to troubleshoot pump repairs:
- Check the power supply: Ensure that the pump is properly connected to the power source and that the circuit breakers are not tripped.
- Inspect the float switch: The float switch controls the pump’s operation. Check if it is stuck or obstructed, preventing the pump from turning on or off.
- Examine the impeller: The impeller is responsible for moving water through the pump. Look for any obstructions or damages that may affect its performance.
- Check the discharge pipe: Ensure that the discharge pipe is free from clogs or blockages that may hinder water flow.
- Inspect the seals and gaskets: Leaks can occur if the seals and gaskets are worn out or damaged. Check them for any signs of deterioration.
- Test the pressure switch: The pressure switch controls the pump’s activation based on water pressure. Make sure it is functioning correctly.
- Verify the motor: Examine the motor for any issues, such as overheating, unusual noises, or burnt-out components.
- Check the wiring: Inspect the wiring for any loose connections, frayed wires, or damaged insulation.
- Refer to the pump’s manual: If you’re still unable to identify the problem, consult the pump’s manual or contact the manufacturer for further guidance.
By following these step-by-step troubleshooting pump repair steps, you’ll be equipped with the knowledge to diagnose and address common pump problems effectively. Remember to exercise caution and, if needed, consider seeking professional assistance when dealing with complex issues or when you’re unsure about performing repairs yourself.
How to Clean and Maintain Your Pump to Avoid Common Issues
Regular cleaning and maintenance are essential to keep your pump functioning properly and prevent common issues. By following these simple maintenance tasks, you can extend the lifespan of your pump and ensure its optimal performance. In this section, we’ll discuss two key aspects of pump maintenance: clearing the discharge outlet from debris and regular pump basin cleaning tips.
Clearing the Discharge Outlet from Debris
Debris in the discharge outlet can obstruct the flow of water and lead to pump problems. It’s important to regularly check and clear the outlet to ensure a smooth water discharge. Here’s how you can do it:
- Turn off the power supply to the pump to avoid any accidents.
- Locate the discharge outlet and remove any visible debris or blockages using a gloved hand or a small tool such as a stick or brush.
- Inspect the outlet for any buildup or clogs. If necessary, use a hose to flush out the debris or a plumber’s snake to dislodge stubborn blockages.
- After clearing the debris, reassemble the discharge outlet and restore the power supply to the pump.
Regularly checking and clearing the discharge outlet will ensure the smooth operation of your pump and prevent potential issues caused by debris buildup.
Regular Pump Basin Cleaning Tips
The pump basin can accumulate dirt and debris over time, affecting the pump’s performance. To maintain the efficiency of your pump and prevent clogs, it’s important to clean the pump basin regularly. Follow these tips to clean your pump basin:
- Start by turning off the power supply to the pump and removing the pump lid.
- Using a bucket or pump, remove any standing water from the basin.
- Inspect the basin for any visible debris, such as leaves or dirt. Remove them using a gloved hand or a small tool.
- Next, rinse the basin with clean water to remove any remaining debris.
- If there are stubborn stains or buildup, you can use a mild detergent or pump cleaner to scrub the basin gently.
- Once you’ve cleaned the basin, rinse it thoroughly with clean water and ensure it’s free from any cleaning residue.
- Finally, reassemble the pump lid and restore the power supply to the pump.
Regular pump basin cleaning will help maintain the efficiency of your pump and prevent potential clogs that could lead to pump issues.
Tips for Safe DIY Well Pump Repair and Maintenance
Repairing and maintaining well pumps require extra precautions to ensure safety. In this section, we’ll share important tips for safely performing DIY well pump repairs and maintenance. We’ll emphasize the use of safety gear, the importance of community communication, and how to diagnose dry well issues during repair.
The Importance of Safety Gear and Community Communication
When working on well pumps, it’s crucial to prioritize safety. Equip yourself with the necessary safety gear to protect against potential hazards. Wear gloves, safety goggles, and appropriate footwear to minimize the risk of injuries. Additionally, consider wearing a dust mask or respirator if working in a dusty environment.
Furthermore, it’s important to communicate with your community about your well repair activities. Inform your neighbors about your maintenance plans to avoid confusion or concerns. Providing them with a heads-up can also help alleviate any potential disruptions in the water supply during the repair process.
Remember, safety gear and community communication are essential for a smooth and secure DIY well pump repair.
Diagnosing Dry Well Issues During Repair
While performing DIY well pump repairs, it’s crucial to be aware of and properly diagnose dry well issues. Dry wells occur when the water level in the well drops below the pump intake, leading to a loss of water flow and potential pump damage.
To diagnose dry well issues, observe the following signs:
- Low water pressure or no water flow from faucets
- Air bubbles or sputtering noise in the water supply
- Pump cycling frequently or running continuously without delivering water
If you suspect a dry well, it’s important to take immediate action to avoid further damage to your pump. Follow these steps during DIY repairs:
- Stop using the pump to prevent overheating.
- Check the water level in the well. If it’s significantly low, consult a professional well contractor to assess the situation.
- If the water level is normal, inspect the pump for any potential blockages or malfunctions.
- Consider testing the well pump’s performance by turning on another source of water, such as a garden hose, and monitoring the water flow.
By properly diagnosing and addressing dry well issues during DIY repairs, you can ensure the longevity and reliable performance of your well pump.
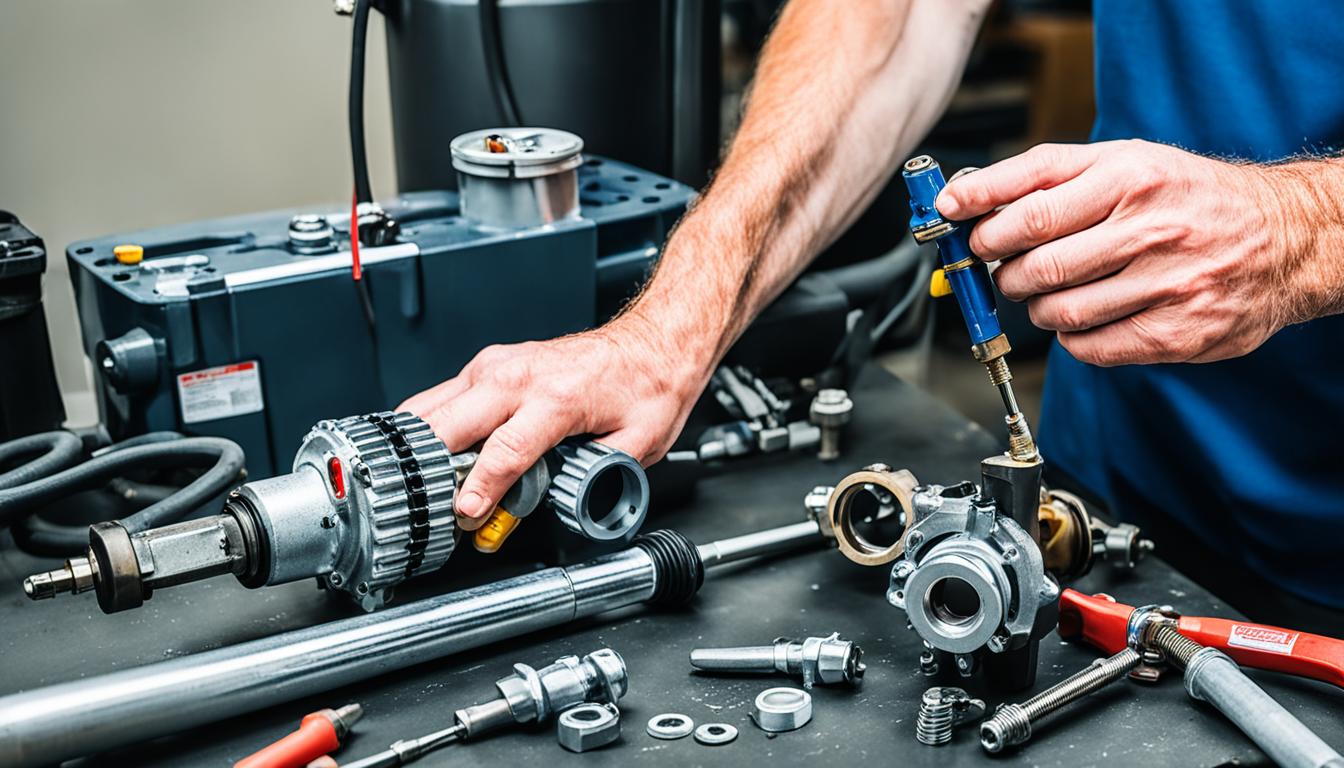
Image:

Addressing Well Pump Contamination Concerns in Your DIY Repairs
Contamination is a common issue that can affect the performance and quality of well pumps. When performing DIY repairs on your well pump, it is important to address contamination concerns to ensure the continued functionality of your water supply. This section will provide you with valuable tips and guidance on preventing contamination, testing water quality, and resolving contamination issues if they occur.
Preventing Contamination:
- Regularly inspect the wellhead and surrounding area for potential sources of contamination, such as chemicals, pet waste, or debris.
- Keep the well cap securely tightened to prevent the entry of dirt, insects, or other contaminants.
- Avoid storing hazardous materials near the well, as they could potentially seep into the groundwater and contaminate the well pump.
- Properly dispose of household chemicals and other hazardous substances to prevent them from entering the water supply.
Testing Water Quality:
- Regularly test the water from your well for any signs of contamination, such as unusual odors, discoloration, or an unpleasant taste.
- Conduct tests for common contaminants, including bacteria, nitrates, heavy metals, and pesticides.
- Follow the testing guidelines provided by your local health department or hire a certified water testing professional.
Resolving Contamination Issues:
- If water testing reveals contamination, immediately take steps to address the problem.
- Disinfect the well and water system using appropriate methods, such as shock chlorination, to eliminate bacteria or other contaminants.
- Install additional filtration systems, such as activated carbon filters or reverse osmosis systems, to remove specific contaminants.
- Seek professional help from a qualified well pump technician or water treatment specialist if the contamination issue requires advanced expertise or specialized equipment.
By following these guidelines, you can help ensure the safety and quality of your well water supply. Remember, addressing well pump contamination concerns is an essential part of DIY repairs to maintain a reliable and clean source of water for your home.
Ensuring Efficiency: Guide to Regular Pump Maintenance
Regular maintenance is essential to ensure the efficiency and longevity of your pump. By following a comprehensive pump maintenance guide, you can prevent costly breakdowns, increase the lifespan of your pump, and maintain optimal performance. In this section, we’ll provide you with essential tips and steps to conduct regular pump maintenance.
How to Determine Pump Maintenance Frequency
When it comes to pump maintenance, determining the frequency of maintenance tasks is crucial. Several factors can influence how often you need to perform maintenance on your pump:
- Type of pump: Different types of pumps have varying maintenance requirements. Submersible pumps, for example, may require more frequent maintenance than centrifugal pumps.
- Usage: High-usage pumps may require more frequent maintenance to ensure they can withstand the demands placed on them.
- Manufacturer recommendations: Follow the manufacturer’s guidelines for maintenance intervals, as they are based on extensive testing and experience with their specific pump models.
Considering these factors will help you determine the ideal maintenance frequency for your pump, ensuring it stays in optimal condition and continues to function efficiently.
Observation and Familiarization with Your Pump System
Observing and becoming familiar with your pump system is essential for successful maintenance. Regularly monitoring your pump’s performance and behavior will enable you to identify any irregularities or potential issues early on. Here are some key steps to take:
- Listen for unusual sounds: Pay attention to any strange noises coming from your pump, as they can indicate underlying problems.
- Check for leaks: Inspect your pump system for any signs of leaks, such as water puddles or damp areas.
- Observe pressure levels: Monitor the pressure gauge on your pump to ensure it remains within the recommended range.
- Keep an eye on motor temperature: Touch the motor of your pump occasionally to check for excessive heat, which could be a sign of motor issues.
By observing and familiarizing yourself with your pump system, you’ll be better equipped to detect potential maintenance issues early and take prompt action, helping to prevent costly repairs and system downtime.
Mechanical and Electrical Aspects of Pump Maintenance
Both mechanical and electrical components of a pump require regular inspection and maintenance. By taking care of these aspects, you can ensure optimal performance and prevent breakdowns. In this section, we will guide you through the process of conducting a mechanical inspection of your pump and provide best practices for lubrication and electrical inspection.
Conducting a Mechanical Inspection of Your Pump
A thorough mechanical inspection is essential to identify any potential issues and ensure the proper functioning of your pump. Follow these step-by-step instructions to conduct a comprehensive mechanical inspection:
- Check the mounting points of the pump to ensure they are secure and free from any damage or wear.
- Inspect the seals of the pump for any signs of leakage or deterioration. Replace any damaged seals promptly.
- Examine the filters in the pump system and clean or replace them if necessary. Clogged filters can restrict the flow of water and impact the pump’s performance.
By regularly conducting a mechanical inspection of your pump, you can identify and address any issues early on, preventing further damage and ensuring its longevity.
Lubrication and Electrical Inspection Best Practices
Proper lubrication and electrical inspection are crucial for maintaining the efficiency and reliability of your pump. Follow these best practices to ensure optimal performance:
- Regularly lubricate the moving parts of your pump according to the manufacturer’s recommendations. Proper lubrication reduces friction, minimizes wear and tear, and extends the lifespan of your pump.
- When performing electrical inspections, check the terminations, motor vents, and windings for any signs of damage or overheating. Tighten any loose connections and ensure proper insulation.
Regularly inspecting and lubricating your pump’s mechanical components and conducting electrical inspections can help you detect and prevent issues, ensuring your pump operates at its best.

The Critical Practice of Replacing Damaged Seals and Hoses
Ensuring the integrity of your pump system is essential for maintaining its optimal performance. Damaged seals and hoses can lead to leaks and decreased pump efficiency. In this section, we’ll highlight the importance of promptly replacing damaged seals and hoses in order to maintain a watertight and efficient pump system.
When seals and hoses become worn or damaged, they can compromise the overall functionality of your pump. Leaks can occur, resulting in water loss and potential damage to your property. To avoid these issues, it is crucial to identify and replace damaged seals and hoses as soon as possible.
To identify damaged seals, inspect them for signs of wear, such as cracks, splits, or a deteriorated appearance. It’s important to note that not all damage may be visible, so pay attention to any changes in your pump’s performance, including decreased water pressure or unusual noises.
Similarly, hoses should be examined for any signs of damage, including leaks, cracks, or bulges. A damaged hose can disrupt the flow of water and affect the pump’s efficiency.
When replacing seals and hoses, it’s essential to choose high-quality replacements that are compatible with your pump system. Consult the manufacturer’s guidelines or seek professional advice if you’re unsure about the appropriate replacement parts.
By promptly replacing damaged seals and hoses, you can ensure a reliable and efficient pump system that operates without leaks or performance issues. Regular inspection and maintenance are key to preventing further damage and optimizing the lifespan of your pump.
| Signs of Damaged Seals | Signs of Damaged Hoses |
|---|---|
| Cracks or splits | Leakage |
| Deteriorated appearance | Cracks or bulges |
| Decreased water pressure |
When to Call the Experts for Pump Repairs and Maintenance
While many pump repairs and maintenance tasks can be done DIY, there are instances where it’s best to call in the experts. In this section, we’ll discuss the signs that indicate you need professional help and the benefits of professional pump servicing. Knowing when to seek expert assistance can save you time, effort, and potential mistakes.
Recognizing the Signs That You Need Professional Help
If you encounter any of the following signs, it’s crucial to consider professional pump repairs:
- Persistent pump problems that have not been resolved through DIY efforts
- Major system failures, such as a complete pump breakdown or extensive damage
- Complex electrical issues that require specialized knowledge and expertise
It’s important to recognize these signs and understand when the expertise of professionals is necessary to ensure the proper functioning of your pump system.
Benefits of Professional Pump Servicing
Calling in professionals for pump servicing offers several advantages:
- Expertise: Professionals have in-depth knowledge and experience in pump repairs, ensuring accurate diagnoses and effective solutions.
- Specialized tools: Professionals have access to specialized tools and equipment that are essential for complex repairs and maintenance tasks.
- Comprehensive inspections: Professionals can conduct thorough inspections of your pump system, identifying potential issues before they become major problems, and providing preventative maintenance.
By opting for professional pump servicing, you can have peace of mind knowing that qualified experts are handling your pump repairs and maintenance, optimizing the performance and lifespan of your pump system.
Conclusion
In conclusion, this easy home DIY pump repairs guide has provided you with valuable information and tips for troubleshooting, repairing, and maintaining your pump system. By following the steps outlined in this guide, you can save money, time, and hassle by performing many pump repairs yourself. Whether you’re dealing with a sump pump or a well pump, the detailed instructions and practical advice will empower you to tackle pump issues and keep your water management system running smoothly.
However, it’s crucial to know your limitations and seek professional assistance when needed. Some pump problems may require specialized tools, expertise, or complex electrical knowledge that might be beyond the scope of a DIY repair. Prioritizing safety is of utmost importance, so if you encounter any major system failures or are unsure about handling certain repairs, don’t hesitate to reach out to a qualified professional.
Remember, regular pump maintenance is the key to extending the lifespan and optimizing the performance of your pump system. By following the recommended maintenance tasks outlined in this guide, such as checking power supply, cleaning the pump basin, and conducting routine inspections, you can prevent common pump issues and ensure your system operates at its best.
With the knowledge and skills gained from this comprehensive pump repair guide, you can confidently address pump problems, troubleshoot issues, and perform necessary maintenance. By taking a proactive approach and implementing the tips and techniques described herein, you’ll be well-equipped to keep your home’s pump system functioning efficiently and effectively for years to come.
FAQ
What is the role of sump pumps in home water management?
Sump pumps play a crucial role in protecting your home from basement flooding and water damage by removing water that accumulates in the sump pit.
What are some common sump pump problems and their simple fixes?
Common sump pump problems include pump not turning on, unusual noises, and pump running continuously. Simple fixes for these problems include checking the power supply, cleaning the pump, and adjusting the float switch.
How can I troubleshoot power supply issues with my sump pump?
You can troubleshoot power supply issues by checking the breakers and GFCI outlets to ensure they are not tripped or faulty. Additionally, make sure your sump pump is on the proper circuit.
What steps can I follow to troubleshoot pump repairs at home?
You can troubleshoot pump repairs at home by checking the float switch, inspecting the impeller, testing the power supply, and ensuring the discharge outlet is clear of debris.
How can I clean and maintain my pump to avoid common issues?
To clean and maintain your pump, you should regularly clear the discharge outlet from debris and clean the pump basin, ensuring it is free of dirt and debris.
What safety precautions should I take when performing DIY well pump repairs?
When performing DIY well pump repairs, it is important to wear safety gear, such as gloves and goggles, and to inform your community about the repair activities to prevent confusion or concerns.
How can I address well pump contamination concerns during DIY repairs?
To address well pump contamination concerns during DIY repairs, you should take steps to prevent contamination, test the water quality, and resolve any contamination issues if they occur.
How often should I perform regular maintenance on my pump?
The frequency of pump maintenance depends on factors such as pump type, usage, and manufacturer recommendations. It is important to observe your pump system and become familiar with its normal operation to identify any potential issues that require attention.
What aspects of the pump should I inspect during regular maintenance?
During regular maintenance, you should conduct a mechanical inspection, checking mounting points, seals, filters, and conduct pump lubrication. Additionally, it is important to inspect the electrical components, such as terminations, motor vents, and windings.
How important is it to replace damaged seals and hoses in my pump?
It is crucial to replace damaged seals and hoses promptly to maintain a watertight and efficient pump system. Damaged seals and hoses can lead to leaks and decreased pump performance.
When should I call in the experts for pump repairs and maintenance?
You should call in the experts for pump repairs and maintenance when you experience persistent pump problems, major system failures, or complex electrical issues. Professional pump servicing offers expertise, specialized tools, and comprehensive inspections to identify potential issues before they become major problems.
Source Links
- https://www.olshanfoundation.com/blog/sump-pump-repair/
- https://thepumphouseng.com/pump-maintenance-in-8-easy-steps/
- https://empirepumpinc.com/residential-well-services/diy-home-well-pump-repairs/
This post contains affiliate links.